

R&D Engineer · Thailand

Designing products that are ready for the factory floor.

I'm Aung Thura — an R&D engineer specialising in 3D CAD, product design and electronics enclosure development. I turn concepts into manufacturable, production-ready products.

5+Years in industrial design & mechanical engineering
16Featured projects, concept to prototype
6Main skill areas, from CAD to prototypes
4Industries — robotics, medical, consumer, industrial
Portrait of Aung Thura
Aung ThuraResearch & Development Engineer
Electronics
Industry
01 — Designing precision

I design practical, user-centred products that combine functionality, aesthetics and efficient manufacturing — from the first sketch to the production line.

A.Expertise

With over five years of experience in industrial design and mechanical engineering, I specialise in transforming ideas into production-ready products through precision CAD modelling and thoughtful engineering — spanning product design, electronics enclosures, robotics, industrial automation and design for manufacturing.

B.Background

As a Research and Development Engineer at a leading electronics company in Thailand, I design and develop innovative electronic products from concept through manufacturing, backed by experience in robotics, medical devices, consumer electronics and industrial equipment.

Consumer electronicsIoT & embedded devicesRoboticsMedical devicesIndustrial equipmentPayment & vending systems
02 — How I work

From concept to production-ready.

Every project moves through the same disciplined path, so the design that looks right on screen also builds right on the line.

Step 01

Concept

Requirements, user needs and ergonomics shaped into early product ideas.

Step 02

3D CAD

Precise parts, assemblies and packaging around PCBs and components.

Step 03

Prototype

3D-printed and functional prototypes to test, iterate and refine.

Step 04

DFM

Optimised for injection molding, sheet metal, CNC and fast assembly.

Step 05

Production

Engineering drawings with tolerances and manufacturing docs.

03 — Inside the design

Every part has its place.

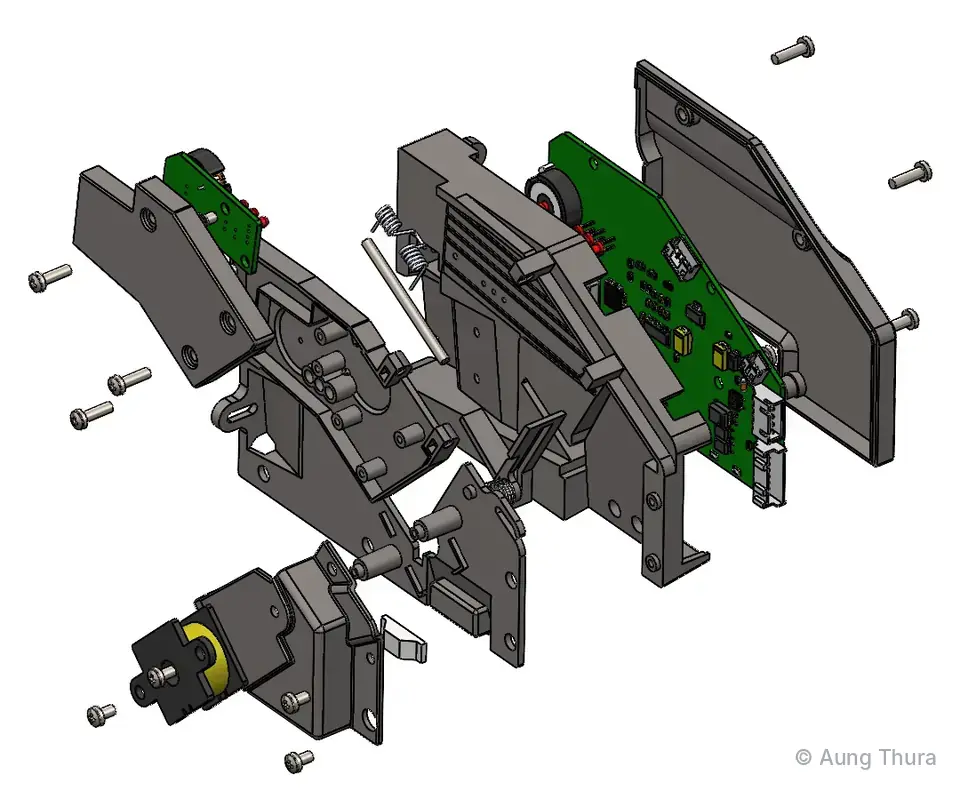
Scroll to take apart a dual-slot coin acceptor I developed. I modelled the housing parts, springs and release knob, and fitted them around the sensor boards and solenoid so everything goes together without clashes.

  • Front panel
  • Housing parts
  • Sensor PCBs
  • Solenoid
  • Springs
  • Release knob
  • Screws
Coin acceptor · SolidWorks assemblyAssembled
Assembled Exploded
04 — Technical skills

What I do day to day.

Most of my time goes into CAD and enclosure design. These are the areas I work in most, with examples from my own projects.

05 — Featured projects

Selected work.

A few projects from my full-time, freelance and university work. This is only part of what I've worked on.

06 — Sample 3D model

Sample 3D model.

One of my own designs you can explore in 3D. Drag to turn it around, or open the case to see the board inside.

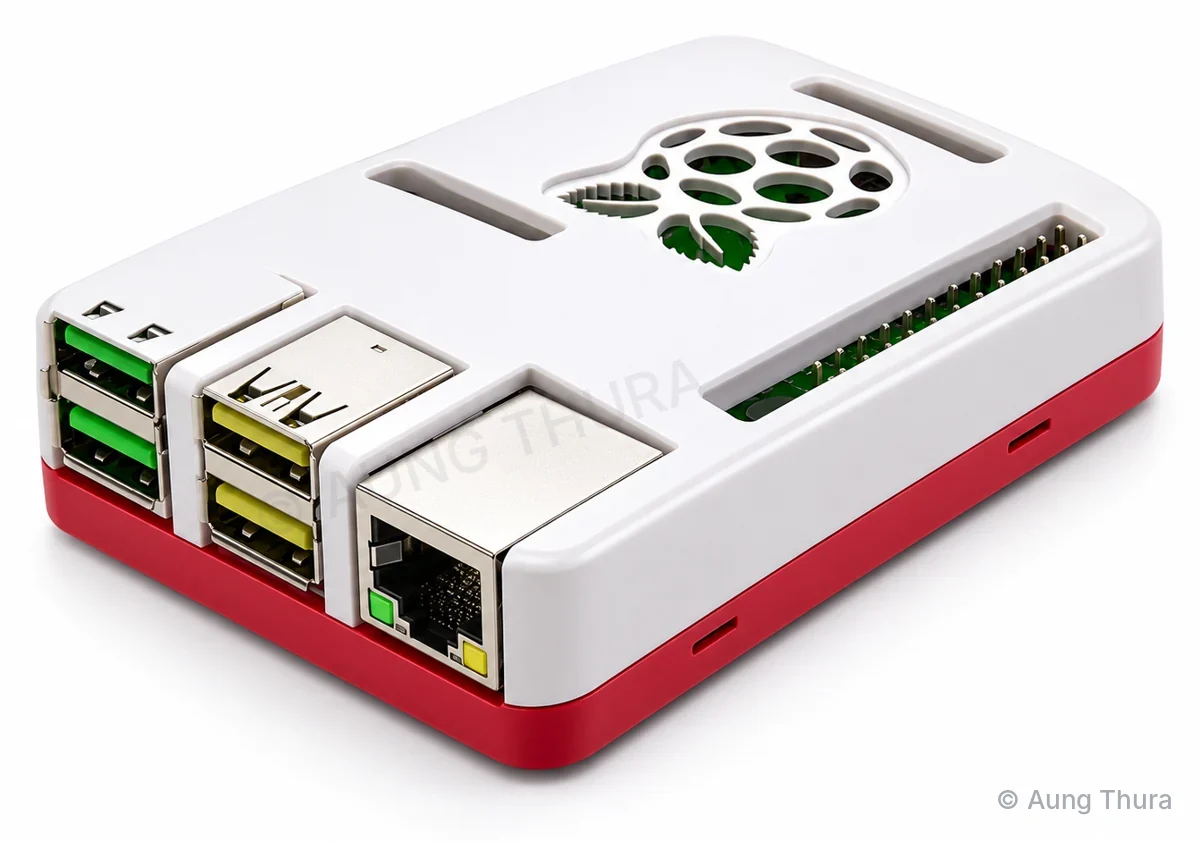
Raspberry Pi 4 enclosure, white top and red base
Loading 3D model…
Drag to rotate © Aung Thura
Personal project · Interactive 3D

Raspberry Pi 4 Enclosure

2022 · Shared free on GrabCAD

A two-part enclosure for the Raspberry Pi 4 Model B that I designed in my own time and shared on GrabCAD as a free download. It can be 3D-printed at home, and it's also designed so it can be manufactured.

The top cover and the base snap together with no screws. Cut-outs give access to every port and the GPIO header, and the air vents on top are shaped like the Raspberry Pi logo.

  • Snap-fit
  • Port access
  • GPIO access
  • Logo air vents
  • 3D-printable
07 — Connect with me

Let's build
something real.

Ready to bring your next industrial design project to life? Let's discuss how we can engineer a product that is as functional as it is elegant.

Email copied to clipboard